Learn Git and GitHub
Building Your Coding Skills: An In-Depth Look at Git and GitHub


Table of contents
Introduction
Git and GitHub are essential tools in modern software development, providing version control and collaboration features that streamline the development workflow. This blog post aims to provide a comprehensive guide to understanding and effectively using Git and GitHub.
Git
It was created by Linus Torvalds in 2005 for the development of the Linux kernel.
It has since been adopted by many other projects.
It is available for Mac, Linux, and Windows.
How to install git on windows os.
Git Architecture

1> Repository:- A Git repository is a collection of files and the version history of those files.
There are two types of repositories: local and remote.
Local repositories reside on the developer's machine, while remote repositories are hosted on a server.
2> Working Directory:-
The working directory is the directory on a developer's machine where they are currently working.
It contains the files of the project, and developers make changes to these files during development.
3> Index (Staging Area):-
The index is an intermediate area between the working directory and the repository.
Before changes are committed to the repository, they are staged in the index.
Staging allows developers to selectively commit changes rather than committing all changes in the working directory.
Object Database
Git uses an object database to store its data.
Objects include blobs (file content), trees (directory structure), commits (a snapshot of changes), and tags (references to a specific commit).
Each object is identified by a unique hash.
Git Initialize
This command initializes a new Git repository.
It creates a hidden subfolder within the existing directory that houses the internal data structure required for version control.
git init
ADD
Stage changes for the next commit.
It is a crucial step in the Git workflow.
git add <file(s) or directory>Example:
1. Stage a specific file.git add myfile.txt
2. Stage all changes in the current directory.git add .
3. Stage all changes in a specific directory.git add myfolder/

Commits
A commit is a snapshot of changes made to the repository.
Each commit has a unique hash, author information, timestamp, and a reference to the parent commit(s).
Commits are used to track the history of the project.
git commitAdd a message on your commit.
git commit -m "Hello world!"When you use
--amend, Git will replace the last commit with a new commit containing the changes you specify.git commit --amend -m "Github"

Logs
Display a log of commits in a repository.
It shows a list of commits in reverse chronological order (from the most recent to the oldest).
You'll see a detailed output that includes information about each commit, such as the commit hash, author, date, and commit message.
git logDisplay each commit on one line, showing only the commit hash and the first line of the commit message.
git log --onelineDisplay a text-based graph of commits and branches.
git log --graphShow commits only by a specific author.
git log --author=author_nameShow commits made within a specified time range.
git log --since="3 days ago"Limit the number of commits displayed.
git log -n 5You can replace
5with any other number to limit the log output to a specific number of commits.git log --graph --oneline --decorateIt will display a compact and visually appealing commit history with a graph, commit hashes, commit messages, and information about branches or tags.
This is especially useful for understanding the structure of your Git repository, tracking the flow of changes, and identifying significant commits.git log --graph --oneline --decorate --allIt will display a compact, graph-like representation of the commit history, showing the commit hashes, commit messages, and where branch and tag references point.
This is particularly useful for understanding the branching and merging structure of your Git repository.Note- Kill this command by writing
qin the terminal.
Status
Show the status of changes as untracked, modified, or staged, and it provides information about the current branch.
Indicates the current branch you are on.
Lists modified files that have not been staged.
Lists files in your working directory that are not yet tracked by Git.
Lists files that are staged and ready to be committed.
git status
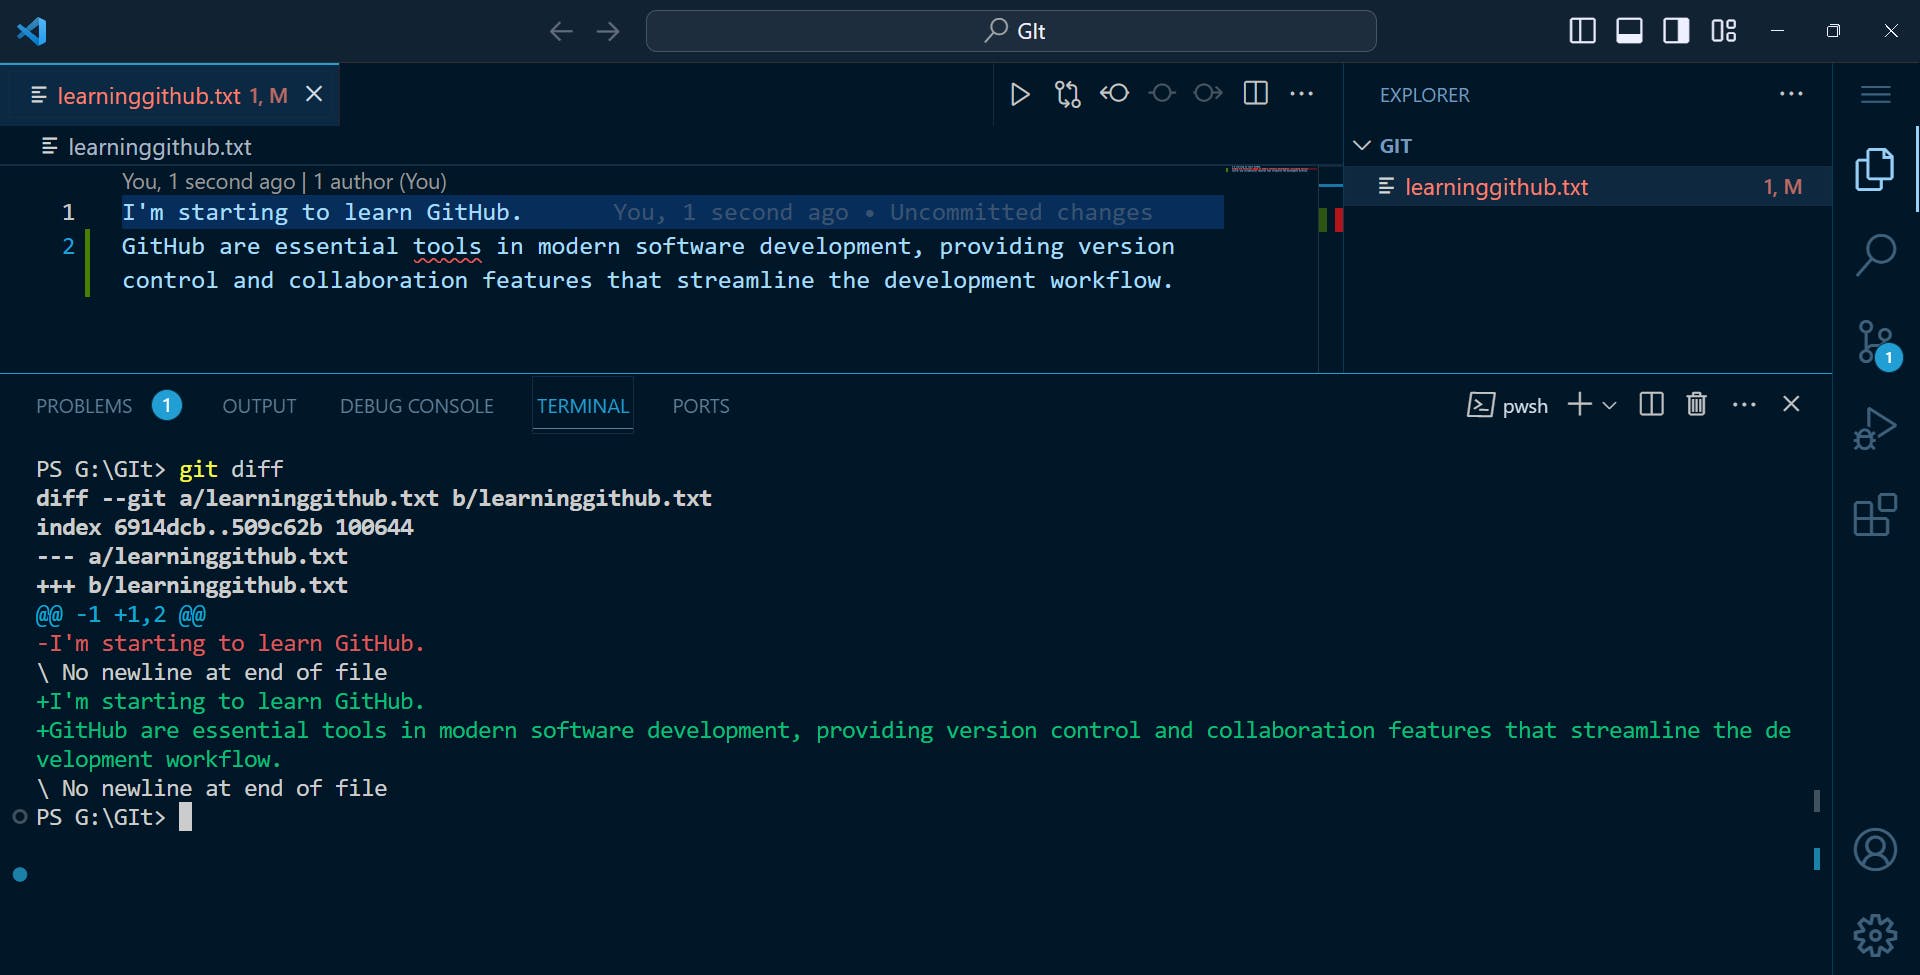
Diff
Show the changes between different commits, between the working directory and the staging area, or between the staging area and a specific commit.
It's a powerful tool for understanding the differences in the content of files.
Compare Working Directory to Staging Area.
git diffCompare Staging Area to Last Commit.
git diff --stagedCompare Two Commits.
git diff commit_hash1 commit_hash2Compare Branches.
git diff branch1..branch2Viewing Changes in a Specific File.
git diff filename
Remove
Remove files from both your working directory and the staging area.
It is the command to use when you want to delete files from your project and have those changes reflected in the next commit.
git rm <file(s)>If you want to keep the file in your working directory but remove it from the repository, you can use the
--cachedoption.git rm --cached <file>

Unstaging
Unstage changes that have been added to the staging area.
It is commonly used when you have added files to the staging area using
git addbut want to remove them from the staging area without discarding the changes in your working directory.git reset HEAD <file>
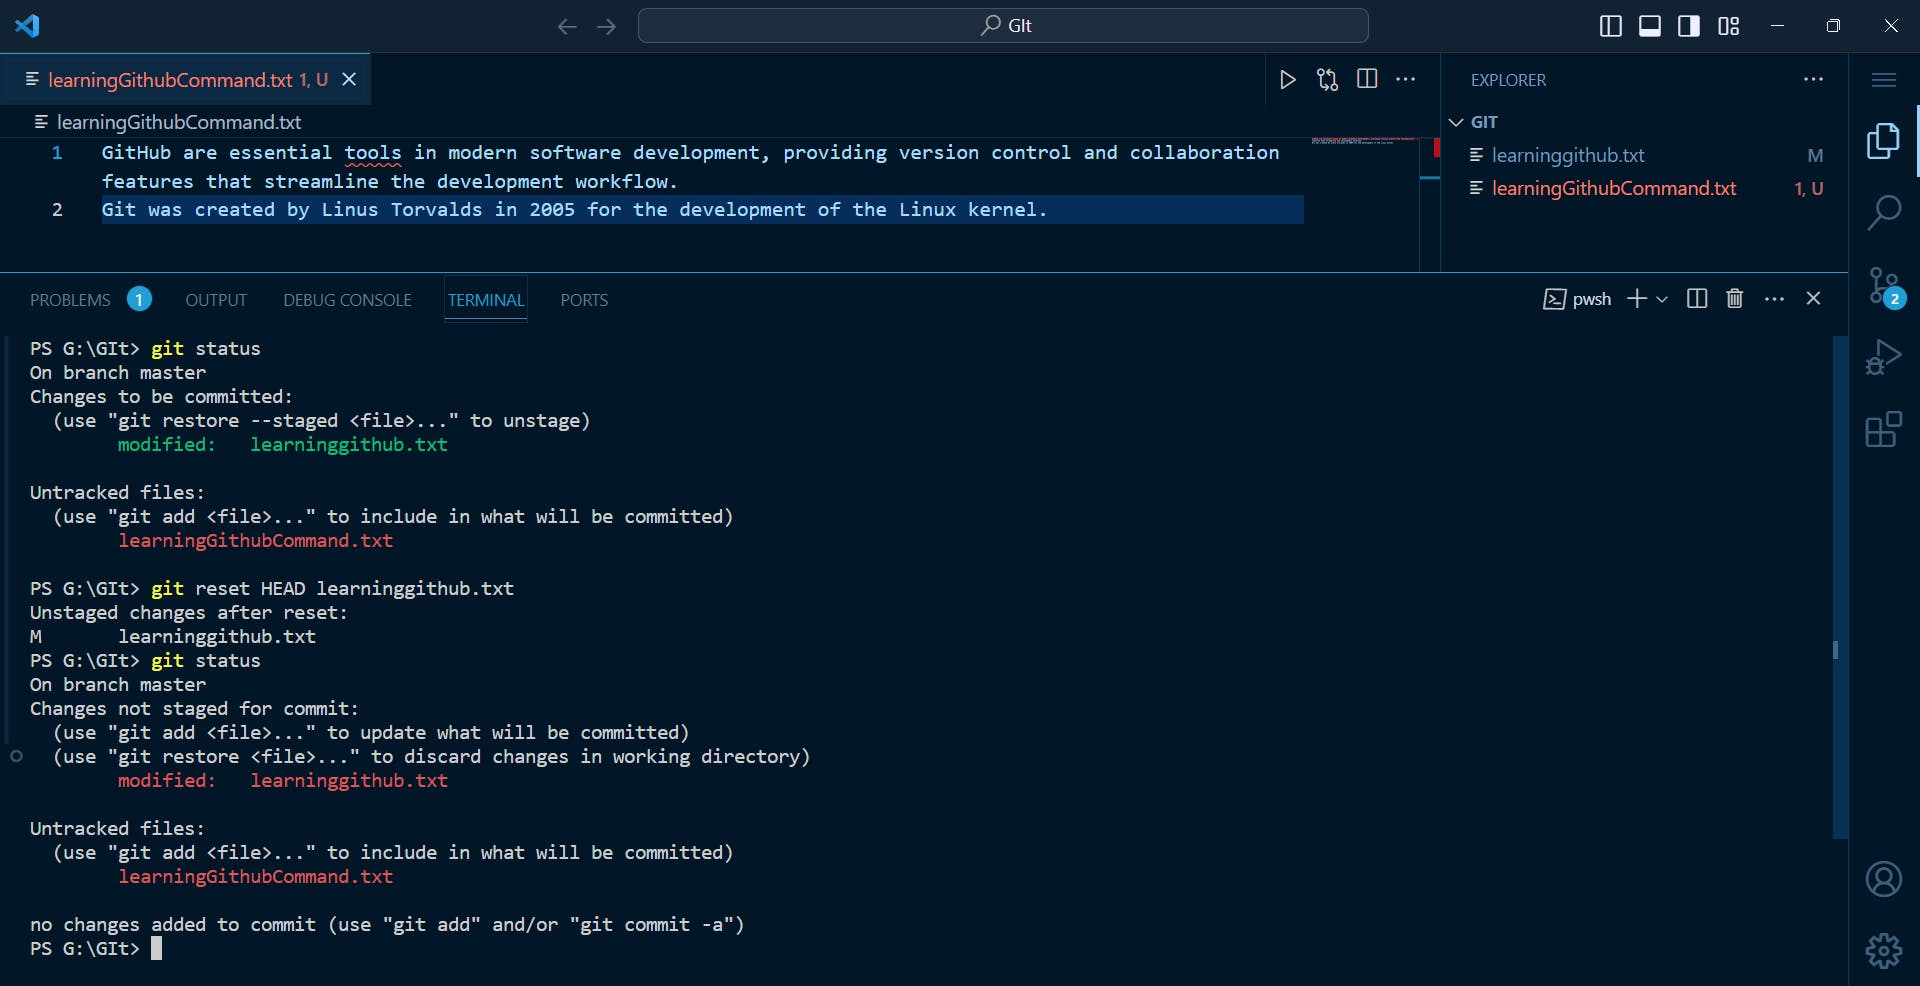
RESET
Reset various aspects of your Git repository.
It can be used to unstage changes, move the HEAD and current branch pointer, or even discard changes in your working directory.
Unstage Changes: This command unstages changes that have been added to the staging area, but it does not discard the changes in your working directory.
git resetUnstage a Specific File: This command unstages the changes for a specific file, leaving the changes in your working directory untouched.
git reset <file>Discard Changes in Working Directory and Unstage: This resets the staging area and working directory to match the most recent commit. Be cautious with this command, as it discards changes in your working directory.
git reset --hardMove HEAD and Branch Pointer: This command moves the HEAD and the current branch pointer to a specific commit, effectively resetting your branch to that commit.
git reset --soft <commit>Mixed Reset (default behavior): This is the default behavior if you don't specify
--softor--hard. It resets the branch pointer to a specific commit and unstages changes.git reset --mixed <commit>
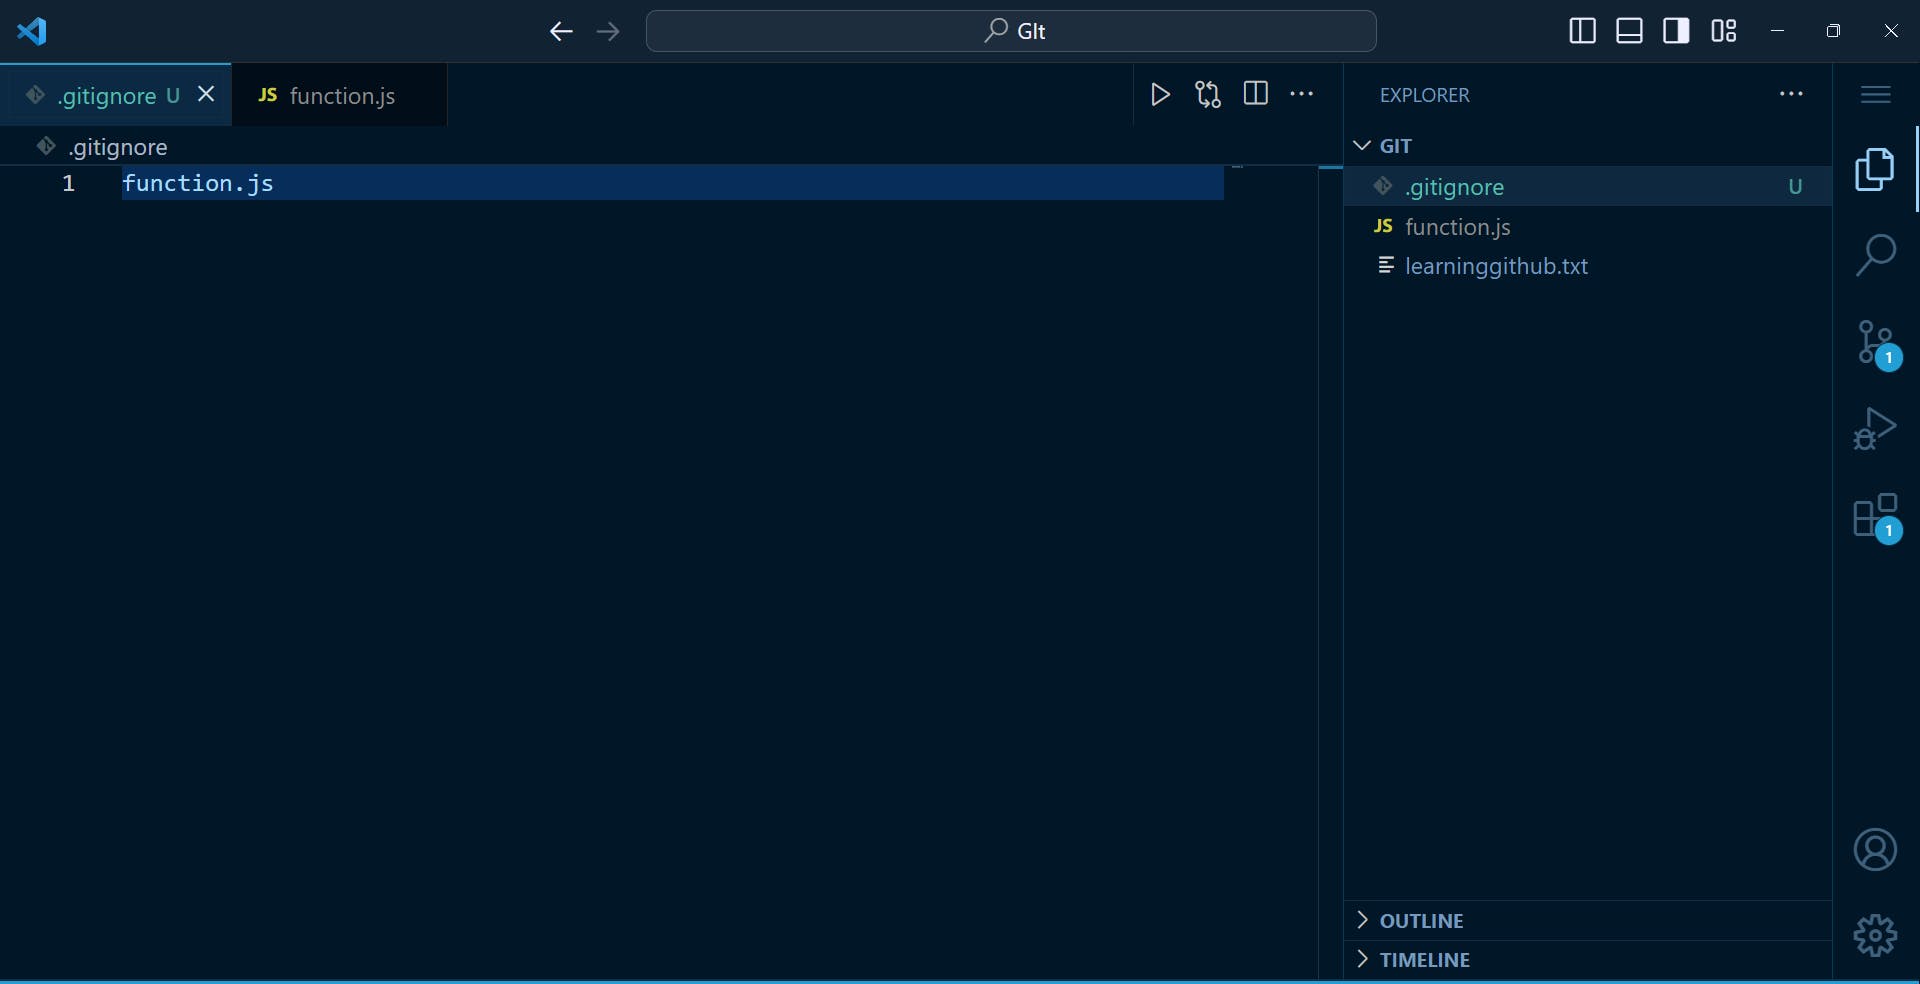
Ignore
The
.gitignorefile is used to specify intentionally untracked files that Git should ignore.This file is typically placed in the root directory of your Git repository.
Its purpose is to tell Git which files or directories should not be tracked by version control.
How it works
Untracked Files: When you create a new file in your Git repository, Git considers it untracked until you explicitly tell Git to start tracking it.
Ignoring Files: If there are certain files or directories that you don't want Git to track, you can specify them in the
.gitignorefile. These could include temporary files, build artifacts, log files, or any other files that are generated during the development process and are not meant to be part of the version-controlled project.Patterns: In the
.gitignorefile, you can use various patterns to specify which files or directories to ignore. For example, you can use wildcard characters like*and?to match multiple files or characters.
# Files
# Ignore all temporary files
*.tmp

# Ignore all log files
*.log

# Folders
# Ignore build artifacts
/build/

# Ignore a specific directory
/ignore-me/
Tree
List the contents of a GitHub repository in a tree-like structure.
This command lists the contents of the current commit (
HEAD) in the form of a tree.git ls-tree HEADThis command lists the contents of the current commit (
Master) in the form of a tree.git ls-tree master

Branches
Branches in Git are lightweight and are used to isolate work on a particular feature or bug fix.
The default branch is usually named "master," but you can create and switch between branches as needed.
Branches allow multiple developers to work on different features simultaneously without interfering with each other.
Create a branch using the command.
git branch branch_nameCheck the list of branches.
git branchnote:- If there's an
*in front of a branch name, it indicates the currently active (checked-out) branch.Move one branch to another branch.
git checkout branch_nameIf the branch doesn't exist locally, create a new branch using
git checkout -b branch_namefor a new branch and switch to it.Delete a local branch in Git.
git branch -d branch_nameIf you want to force delete the branch regardless of its merge status, you can use the
-Doption instead of-dlike this:git branch -D branch_name

Merge
Merge is a Git command used to integrate changes from one branch into another.
This command is often used to combine the changes made in a feature branch with the changes in the main branch (such as
master).git merge <branch_name>
fast-forward merge
A fast-forward merge in Git occurs when the branch being merged into has not diverged from the branch being merged.
In this situation, Git can perform the merge by simply moving the branch pointer forward to point to the same commit as the branch being merged
A fast-forward merge is possible when there are no new commits on the branch you are merging into (
mainin this case) since the branching point of the feature branch.Essentially, the branch you are merging into has not advanced in terms of commits.
To force a fast-forward merge, you can use the
--ff-only.git merge --ff-only feature_branchIn some cases, you may want to perform a regular merge (
--no-ffoption) to create a merge commit and maintain a more explicit history.git merge --no-ff feature_branch
Conflicts
Git conflicts occur when there are conflicting changes in different branches or commits that Git cannot automatically merge.
When you try to merge or pull changes, and Git detects conflicting changes, it will mark the affected files as conflicted.
The conflicted files in your code editor. Git will mark the conflicting sections in the file with special markers, such as
<<<<<<<,=======, and>>>>>>>.<<<<<<<: The beginning of the conflicting changes from your current branch.=======: Separates the conflicting changes from your current branch and the incoming changes from the branch you are merging or rebasing.>>>>>>>: The end of the conflicting changes from the incoming branch.
Abort
Abort a Merge: This command discards the current merge attempt and leaves your working directory and index untouched.
git merge --abortAbort a Rebase: This command cancels the current rebase operation, reverting your branch to its state before the rebase started.
git rebase --abortAbort an Interactive Rebase: This command cancels the interactive rebase.
git rebase --abortAbort Cherry-Pick: This command cancels the current cherry-pick operation.
git cherry-pick --abort
Stash
Git command that allows you to temporarily save changes that you have made to your working directory but are not yet ready to commit.
Stashing is useful when you need to switch branches, perform a pull, or do some other operation that requires a clean working directory without committing your changes.
Stash Changes:
Use the command
git stash save "comments"to save your changes.This command takes your modified tracked files and saves them on a new stash.
Your working directory is reverted to the state of the last commit.
Perform Operations:
- After stashing, you can perform operations like switching branches, pulling changes, or anything else that requires a clean working directory
Apply Stash:
When you're ready to go back to your changes.
git stash applyThis restores the stashed changes to your working directory.
If you have multiple stashes, you can apply a specific stash by providing its reference:
git stash apply stash@{n}
Remove Stash:
After applying the stash, you might want to remove it from the stash list.
You can use
git stash dropfor this.If you want to apply and drop in one command, you can use
git stash pop
List Stashes:
You can see a list of your stashes.
git stash listEach stash is identified by a reference (e.g.,
stash@{0},stash@{1}).
Show Stash:
This command is used to display the changes that are present in a stash.
git stash showIf you want to see the full content of the changes in the stash, you can use the
-poptiongit stash show -p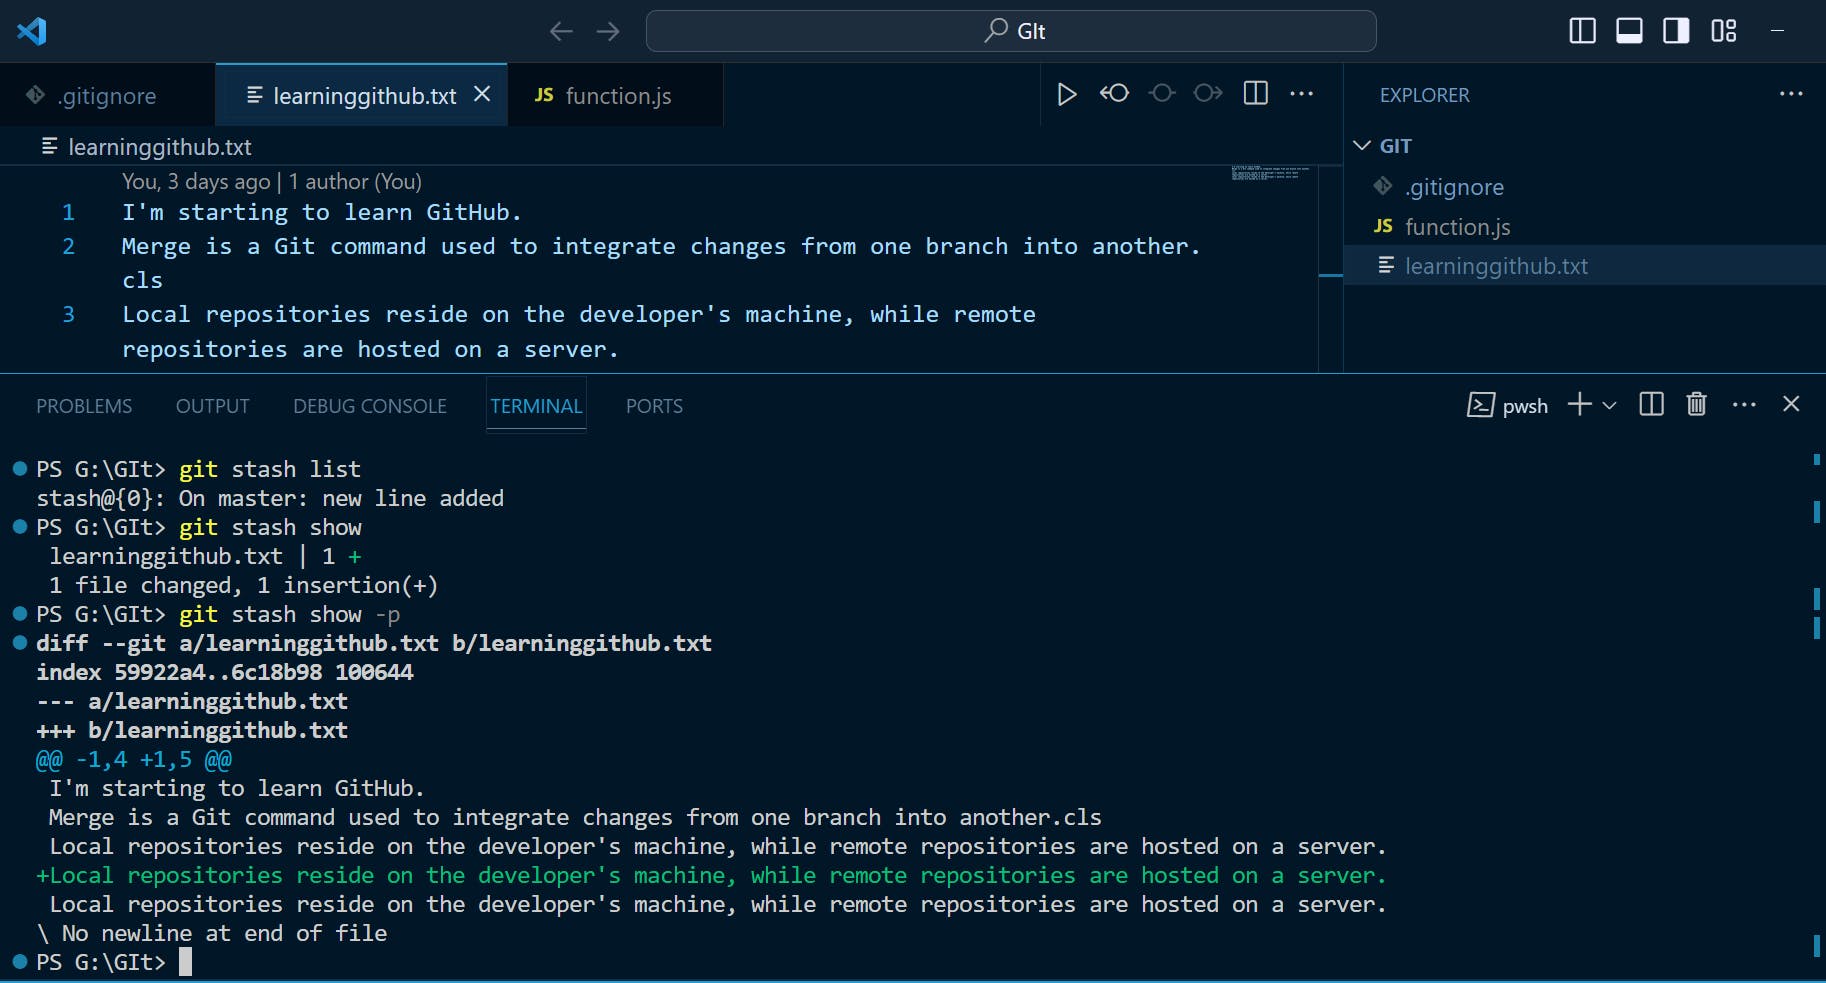
Rebase
Git that allows you to move or combine a sequence of commits to a new base commit.
It is a powerful and flexible tool used for rewriting commit history.
Unlike Git merge, which creates a new commit with multiple parents to merge branches, git rebase integrates changes from one branch onto another by reapplying each commit on top of the target branch.
git rebase <base_branch>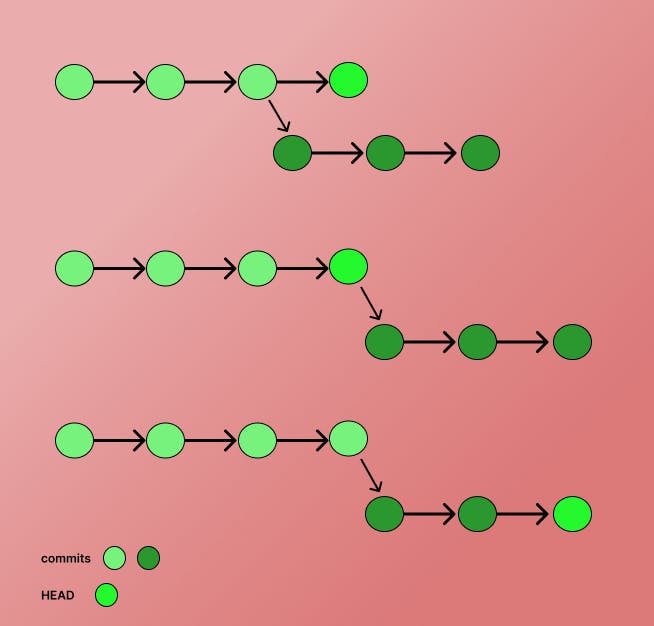
Cherry-pick
Git cherry-pick is a command in Git that allows you to apply a specific commit from one branch to another.
This can be useful when you want to pick and choose individual commits rather than merging entire branches.
git cherry-pick <commit-hash>
HEAD
HEAD is a special pointer that points to the latest commit in the currently checked-out branch.
It represents the current state of the working directory.
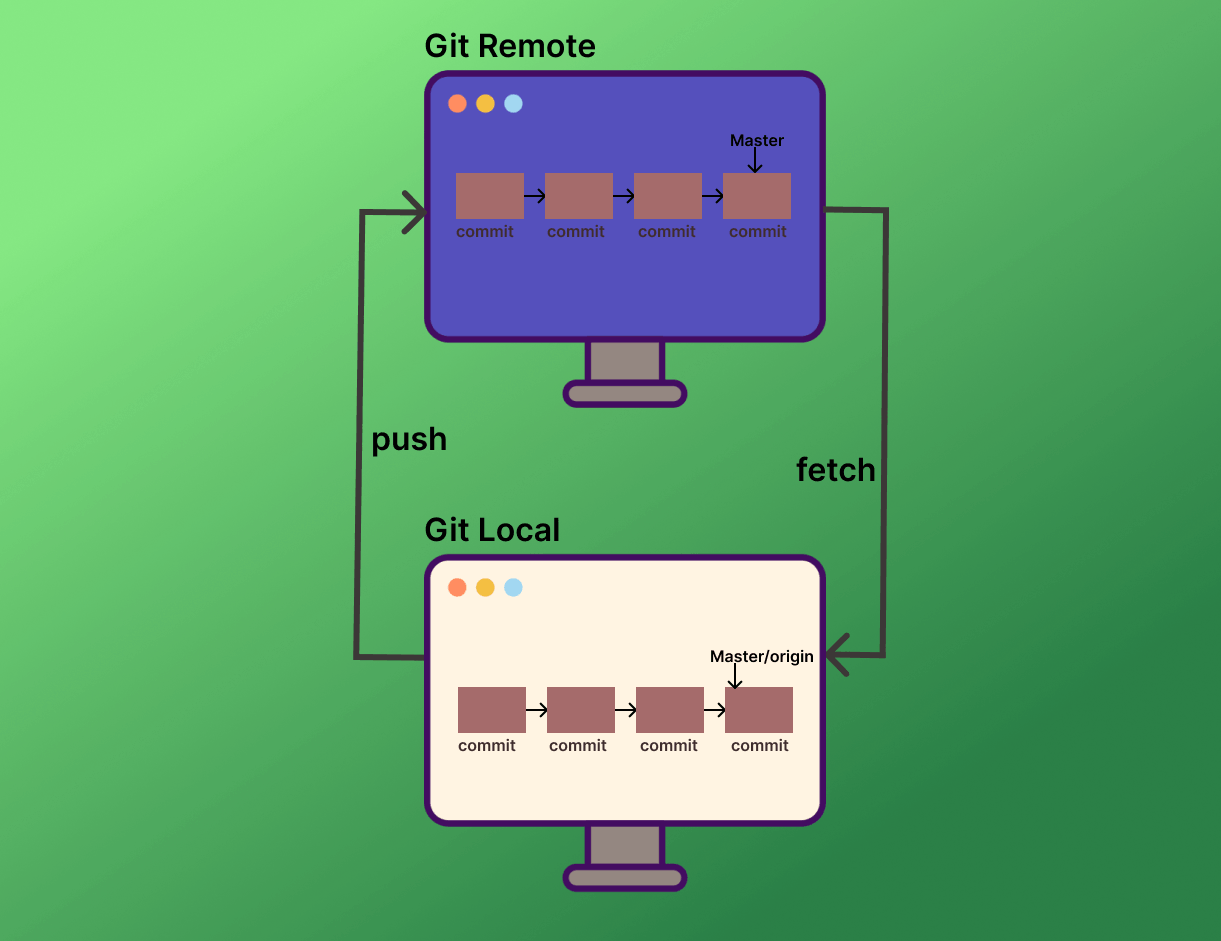
Remote Repository
A remote repository is a Git repository hosted on a server.
Developers can push their changes to a remote repository to share their work with others.
Common remote repository hosting services include GitHub, GitLab, and Bitbucket.
Create Repository
Sign in to GitHub:
Open your web browser and navigate to GitHub.
Sign in to your GitHub account. If you don't have an account, you'll need to create one.
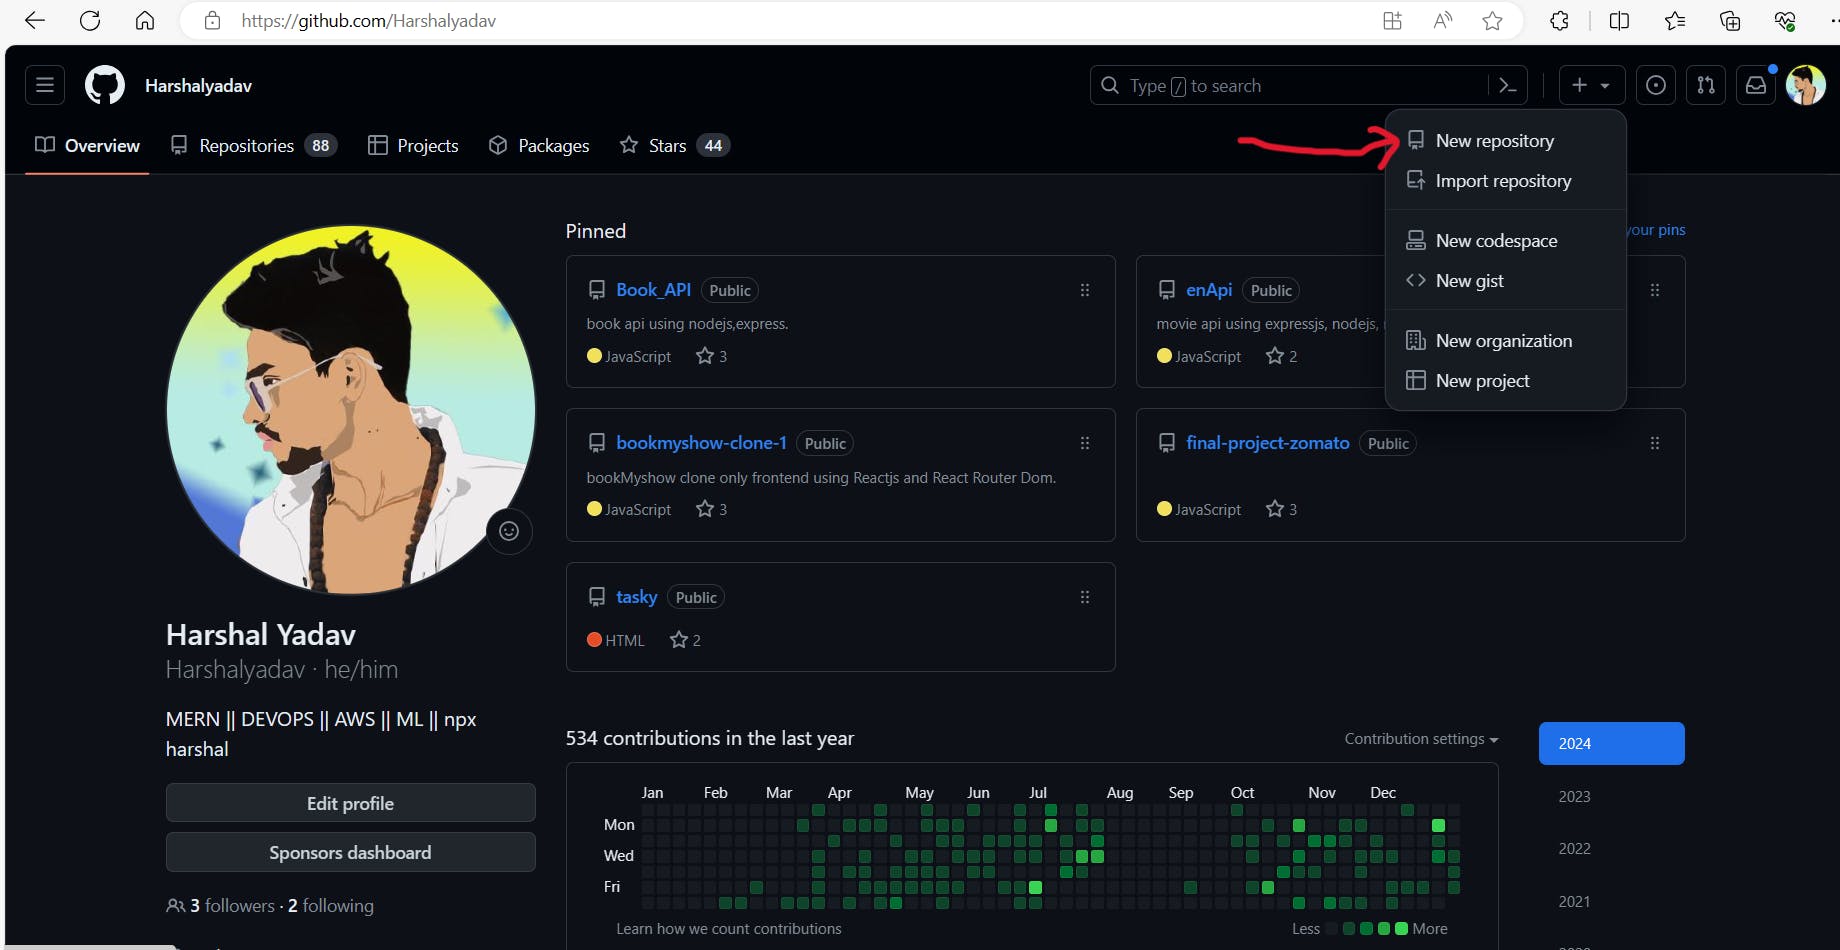
Navigate to Your Dashboard:
After signing in, click on the "+" sign in the upper right corner of the GitHub page.
From the dropdown, select "New repository."
Fill in the Repository Information:
On the "Create a new repository" page, you'll need to provide some information:
Repository name: Choose a name for your repository. This will be part of the repository's URL.
Description (optional): Provide a brief description of your repository.
Public or Private: Choose the repository's visibility. Public repositories are visible to everyone, while private repositories are only visible to you and collaborators.
Initialize this repository with a README (optional):
- If you want to create an initial README file for your repository, check the "Initialize this repository with a README" box. This is often a good practice, as it helps provide information about your project.
Add .gitignore and license (optional):
- You can also choose to add a
.gitignorefile (specifies which files or directories to exclude from version control) and a license file to your repository.
- You can also choose to add a
Create Repository:
- Click the "Create repository" button.

upload your local Git repository to a remote repository on GitHub
Initialize a Git Repository Locally (if not already done):
If you haven't initialized a Git repository locally, open a terminal and navigate to your project folder. Run the following command:
git init
Add a Remote to Your Local Repository:
In the terminal, add the GitHub repository as the remote origin. Replace
<username>and<repository>with your GitHub username and repository name:git remote add origin https://github.com/<username>/<repository>.gitCopy the link to your GitHub repository, then navigate to the '<> Code' tab and select the HTTPS URL.

Add, Commit, and Push:
Add the files you want to include in the repository:
git add .Commit the changes:
git commit -m "Initial commit"Retrieves changes from a remote repository and merges them into the current branch:
git pull origin branch_name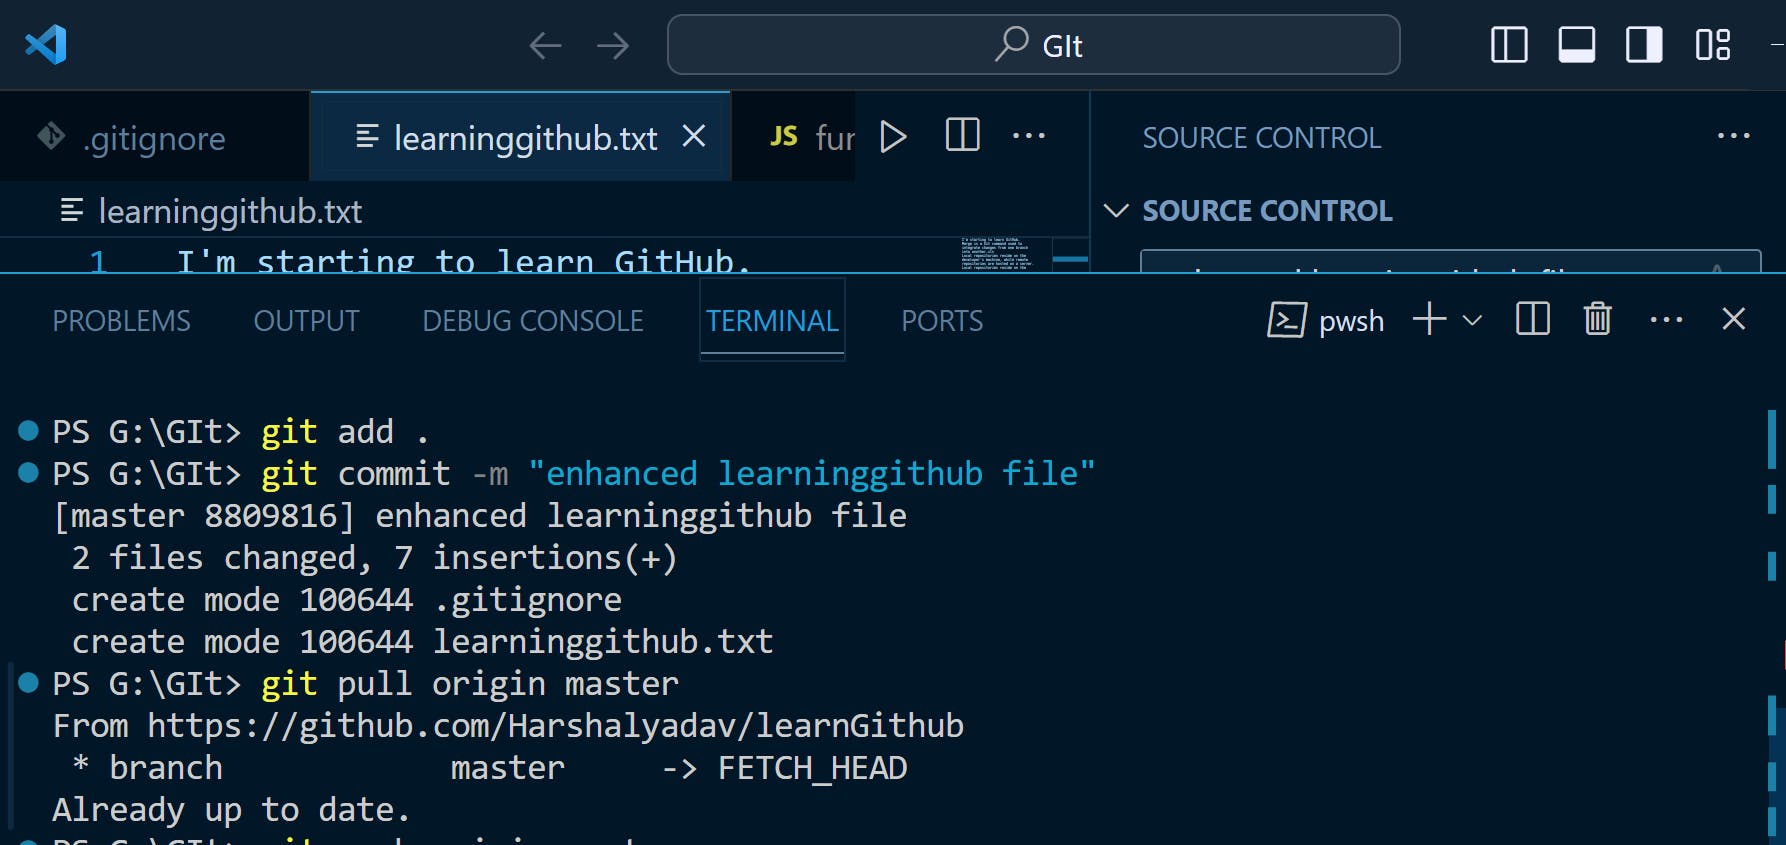
Push the changes to the remote repository:
git push -u origin master
Clone
Creates a copy of a remote repository on the developer's local machine:
git clone repositoryLinkFetch: Retrieves changes from a remote repository without merging them into the local branch.
We are committed to delivering content that informs, inspires, and resonates with you. Your comments, and shared insights fuel our passion to continue creating valuable content.
As we move forward, we invite you to stay connected with us. Feel free to share your thoughts in the comments.
Once again, thank you for being a part of our community. We look forward to continuing this journey together.