
Learn AWS | part 2 | Create an account on AWS
Navigating the Cloud: An In-Depth Introduction to AWS (Part 2)


Table of contents
Create an account
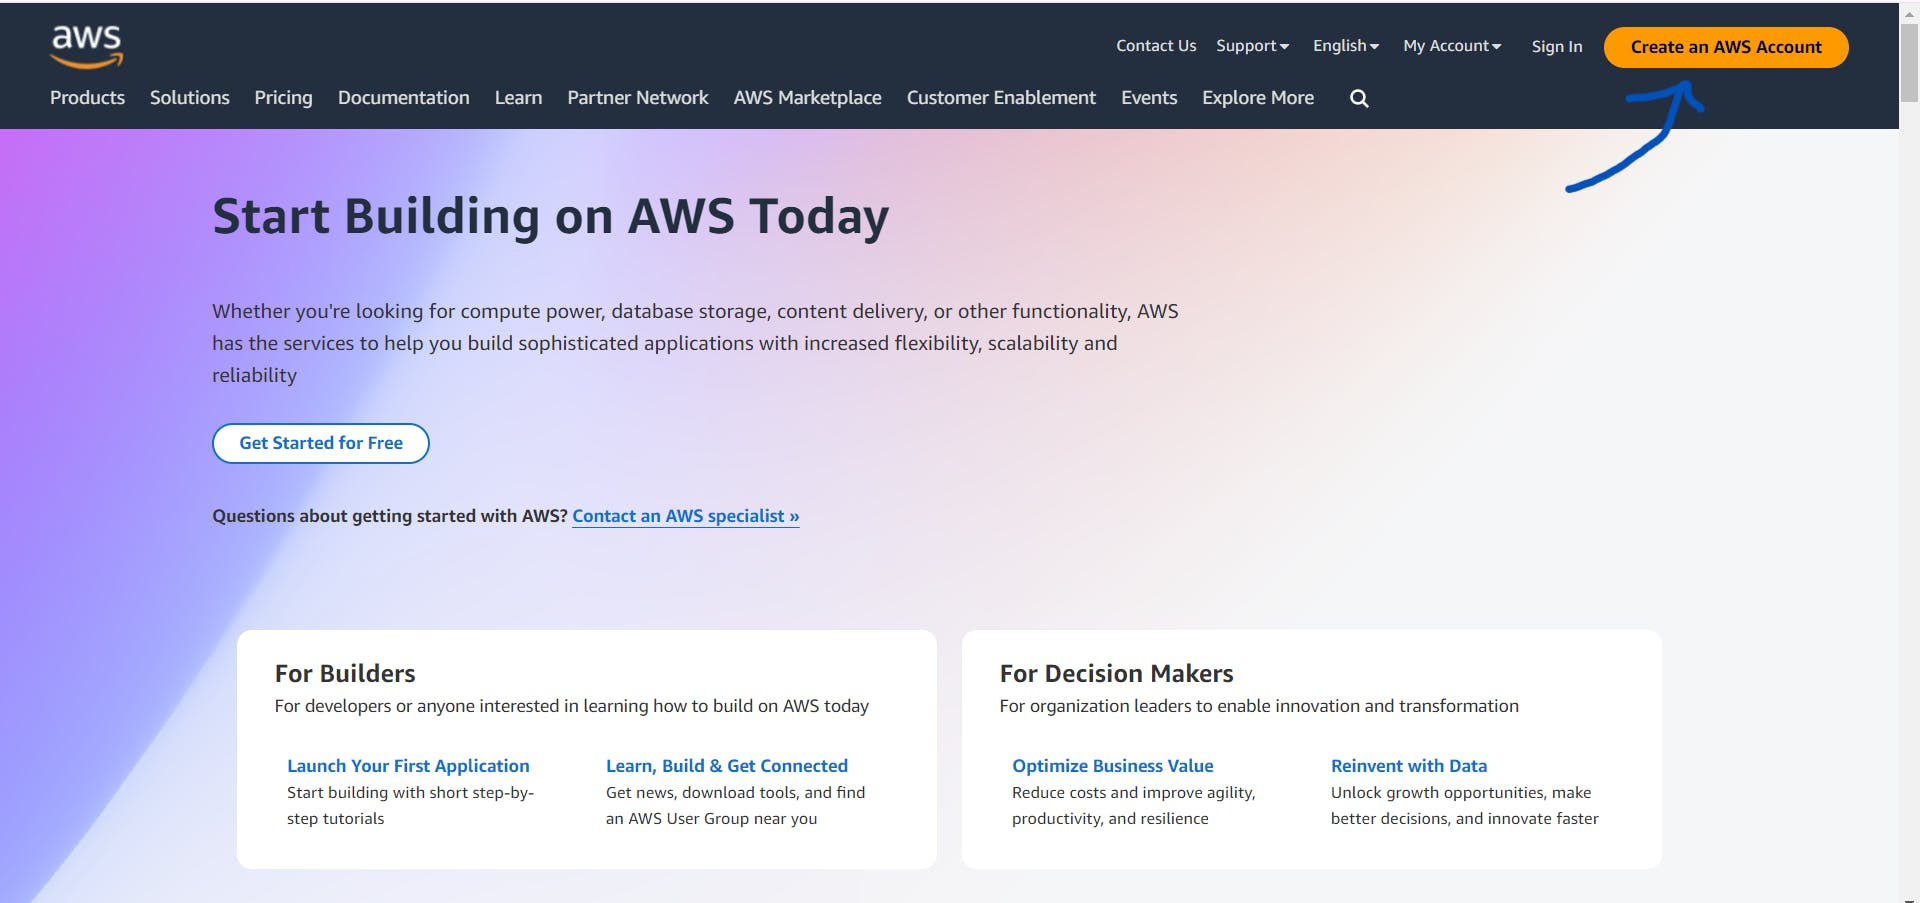
Visit the AWS official website: https://aws.amazon.com/
Click on the "Sign in to the Console" button in the top right corner.
On the next page, click on the "Create an AWS account" button.
Enter your Email address and account name.

Enter your unique code that was sent in your email.

Create a password for your user account.

Enter your personal details.


Enter your payment details.

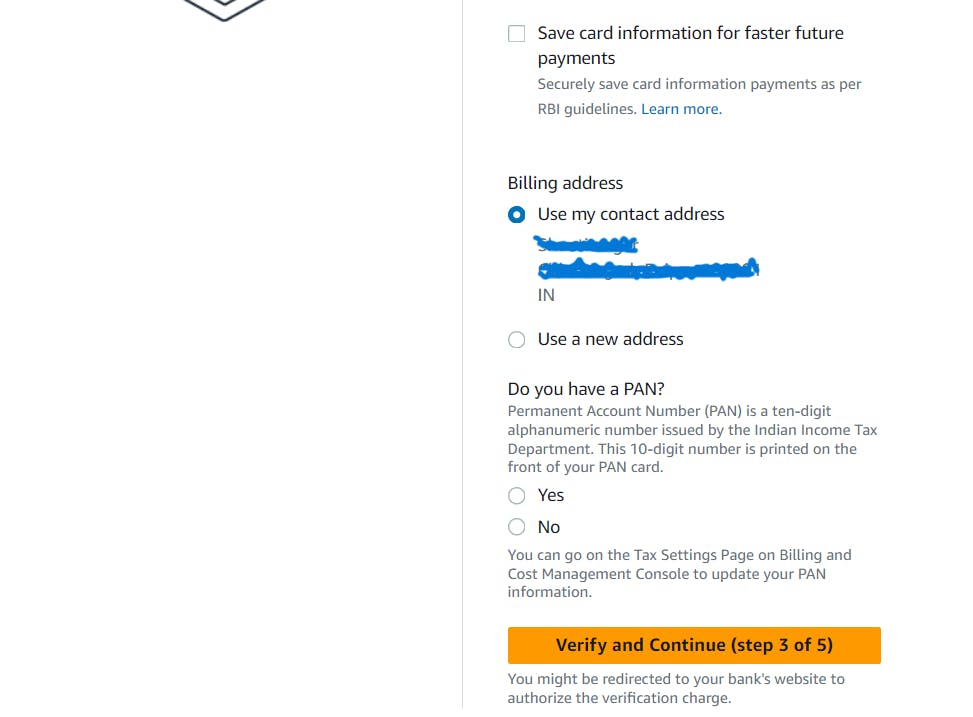
Authenticate your account. AWS will hold 2 rupees and refund the amount in 2 to 6 days.

Confirm your identity.

Enter the verification code.

Select an AWS support plan.

Congratulations! Your account has been created successfully.

Sign in to the AWS Console
Click on the "Sign in to the Console" button in the top right corner.

Enter an Email address and select root user.
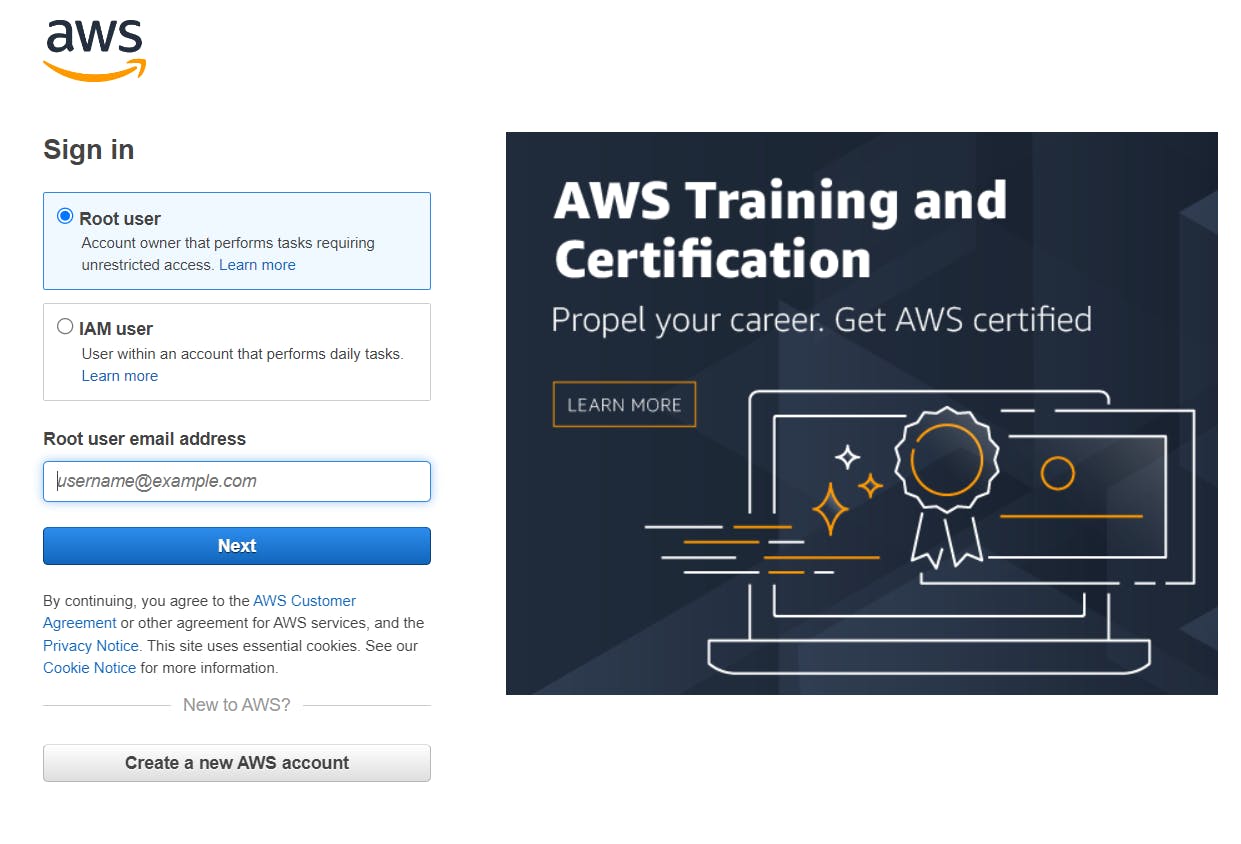
Enter a password and click on sign-in button.

Congratulations! You have successfully logged in.

Close your AWS account
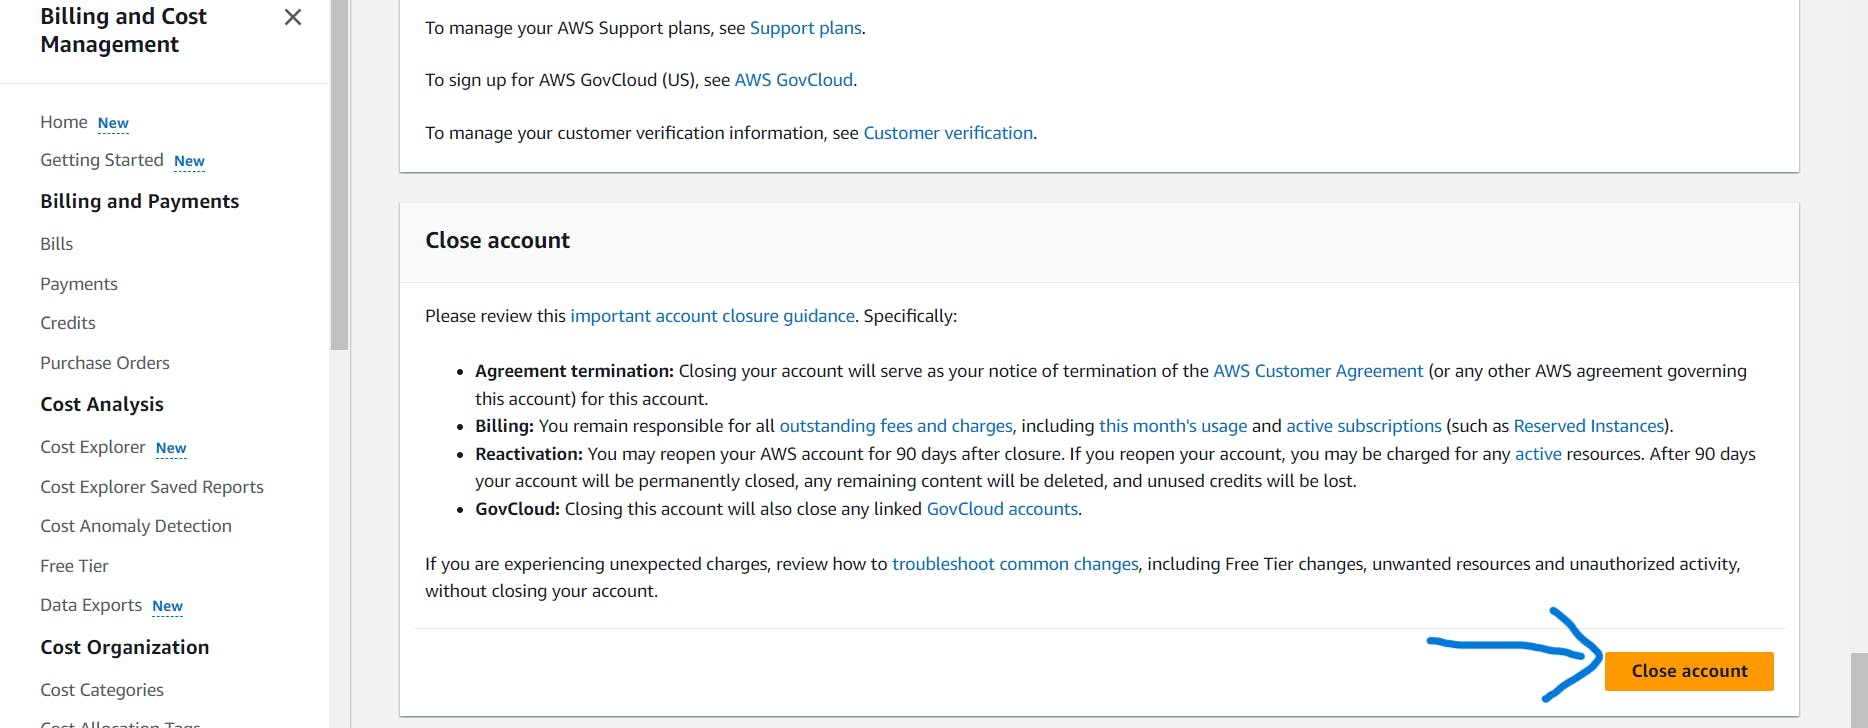
Click on the "User_Name" button in the top right corner.

Click on the 'Account' button. Scroll down until you see the 'Close account' button. Click on the 'Close account' button to delete your account.


You will receive a verification message.


We are committed to delivering content that informs, inspires, and resonates with you. Your comments, and shared insights fuel our passion to continue creating valuable content.
As we move forward, we invite you to stay connected with us. Feel free to share your thoughts in the comments.
Once again, thank you for being a part of our community. We look forward to continuing this journey together.