

Containerizing a node, express, and mongodb application using Docker.
In today's world of scalable and deployable applications, containerization has become a crucial aspect of development and deployment workflows. Docker, a popular containerization platform, allows developers to package applications and their dependencies into a standardized unit called a container. In this tutorial, we'll walk through the process of containerizing a Node.js, Express, and MongoDB application using Docker.
Step 1: Clone a Repository
git clone https://github.com/Harshalyadav/Book_API.git
cd Book_API
npm install
or
npm i
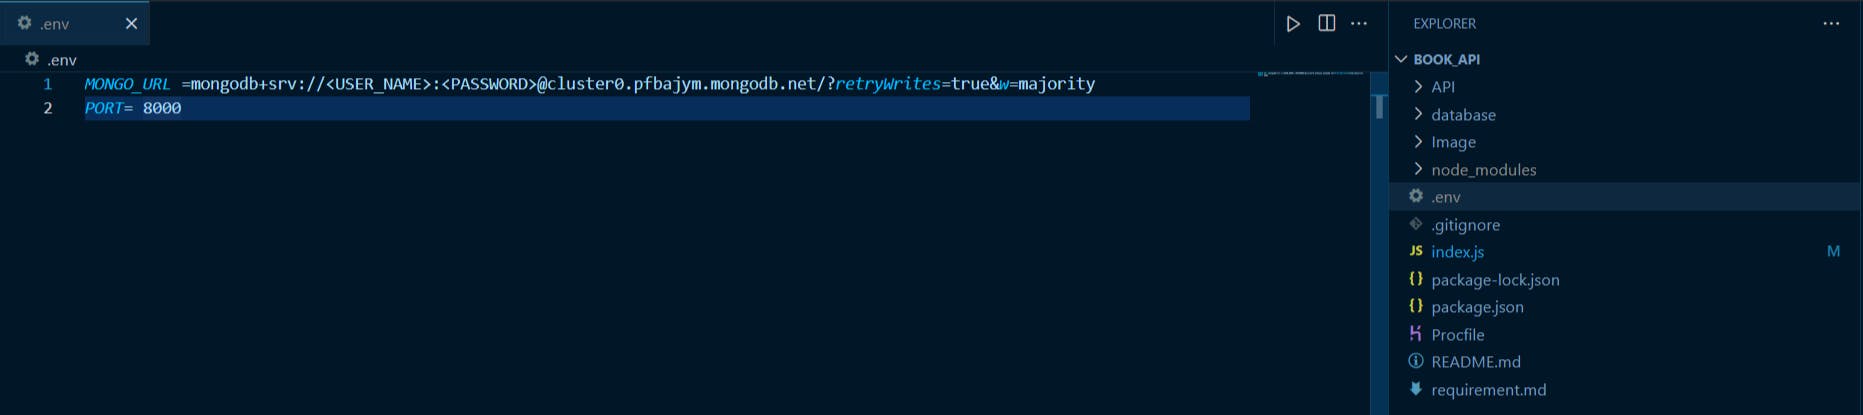
If you want to run this code. You need to add a .env file in the root of this folder. In the .env file, you must define the MongoDB URL and PORT number. Then, run the code using npm run dev or npm start command.
Step 2: Folder Structure

1>API folder:- This folder contains the route handler function.
2>database folder:- This folder contains the database model and schema.
3>image:- This folder contains the images. This image show how to interact with or test your application using tools like Postman.
4>node_module:- This folder contains the dependencies (packages or modules) that your project relies on.
5>.env:- This file is commonly used in web development to store configuration variables, often referred to as environment variables.
6>.gitignore:- This file is used in a Git repository to specify files and directories that should be ignored and not tracked by Git.
7>index.js:- This file has a server and database connection.
Step 3: Initialize Docker
Initialize docker in your application you need docker assets(dockerfile, compose.yaml). docker init command used to initialize the docker file in your application.
docker init
After using docker init they asked:-
1> What application platform does your project use? Node (default select or if not then select)
2>What version of Node do you want to use? 18.16.0
3>Which package manager do you want to use? npm
4>What command do you want to use to start the app: node src/index.js
5>What port does your server listen on? 8000
You will see four new files created on the root directory.
1>Dockerfile.
2>compose.yaml
3>.dockerignore
4>README.Docker.md
Dockerfile: A Dockerfile is a script that contains instructions for building a Docker image.
compose.yaml: This file is a YAML file used to define and configure Docker applications. It allows you to define multiple services, networks, and volumes in a single file, making it easier to manage complex multi-container applications.
.dockerignore: This file is used to specify files and directories that should be excluded from the context when building a Docker image. The context is the set of files and directories located at the specified path or URL in the docker build command.
The purpose of .dockerignore is similar to the .gitignore file in Git
README.Docker.md: This file is typically a Markdown-formatted document that provides instructions, guidelines, and information specific to running or deploying a project using Docker. It serves as documentation for users or developers who are interested in using Docker to set up, run, or deploy the associated project.
Step 4: Edit Dockerfile
A Dockerfile is a script that contains instructions for building a Docker image. Add the Port number and MongoDB URL on it.
# syntax=docker/dockerfile:1
# Comments are provided throughout this file to help you get started.
# If you need more help, visit the Dockerfile reference guide at
# https://docs.docker.com/go/dockerfile-reference/

ARG NODE_VERSION=18.16.0

FROM node:${NODE_VERSION}-alpine

# Use production node environment by default.
ENV NODE_ENV production
ENV PORT 8000
ENV MONGO_URL mongodb+srv://<User_Name>:<Password>@<Cluster_Name>.km7rq7g.mongodb.net/?retryWrites=true&w=majority

WORKDIR /usr/src/app

# Download dependencies as a separate step to take advantage of Docker's caching.
# Leverage a cache mount to /root/.npm to speed up subsequent builds.
# Leverage a bind mounts to package.json and package-lock.json to avoid having to copy them into
# into this layer.
RUN --mount=type=bind,source=package.json,target=package.json \
    --mount=type=bind,source=package-lock.json,target=package-lock.json \
    --mount=type=cache,target=/root/.npm \
    npm ci --omit=dev

# Run the application as a non-root user.
USER node

# Copy the rest of the source files into the image.
COPY . .

# Expose the port that the application listens on.
EXPOSE 8000

# Run the application.
CMD npm start
Step 5: Run the Application
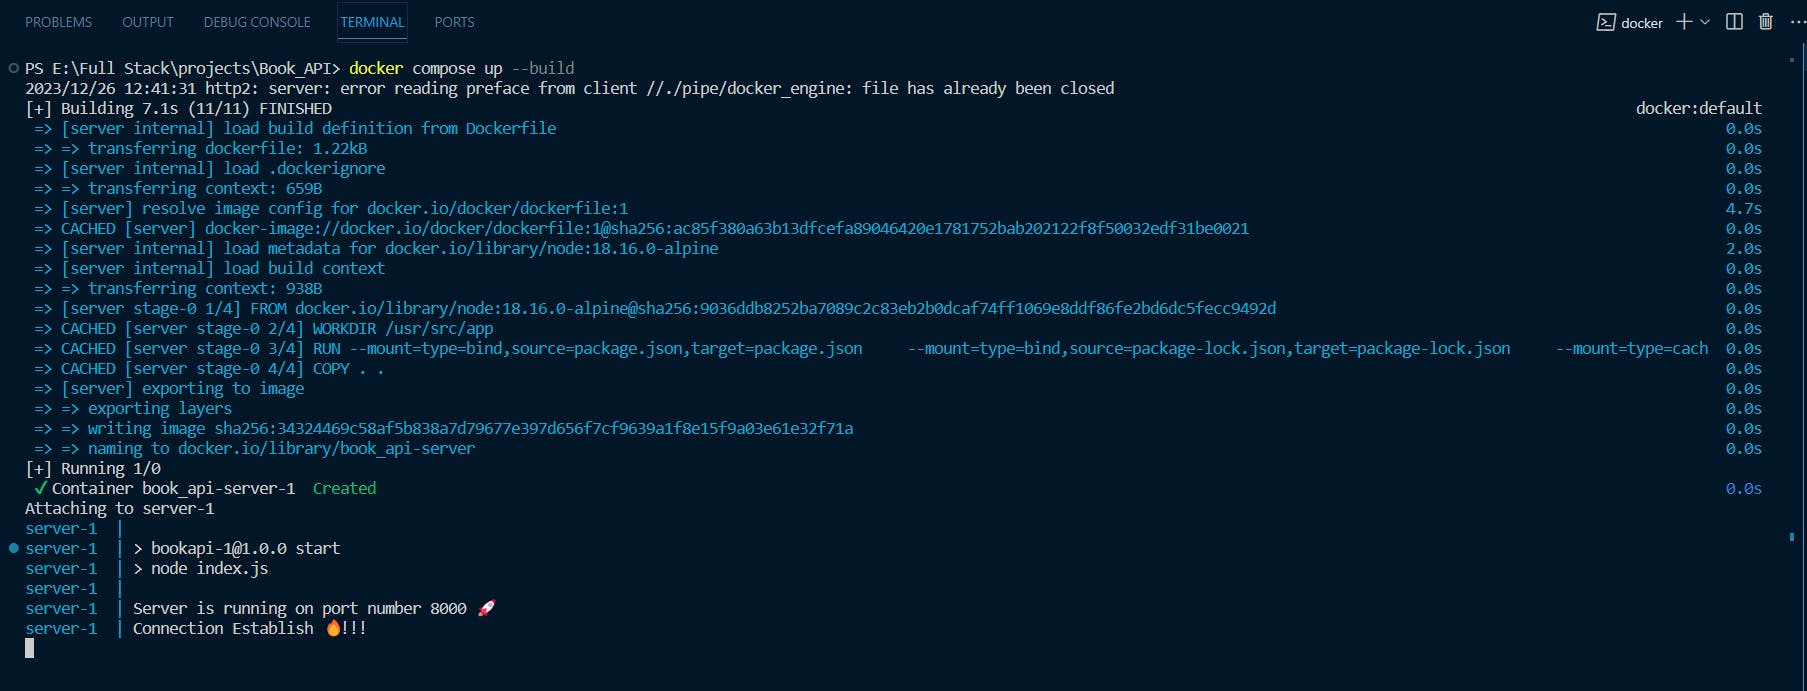
docker compose up --build
or
docker compose up --build -d
#If you want to run your application on background.
The docker-compose up --build command is used to build or rebuild Docker images and start containers defined in the compose.yml file. Output:-
http://localhost:8000
Note:- Docker Desktop must be running.
Step 6: Push a Docker image to Docker Hub
1>Login to Docker Hub: Before pushing an image, make sure you are logged in to your Docker Hub account using the docker login command. Open a terminal and run:
docker login
2>Tag your Docker Image:Before pushing, you need to tag your Docker image with your Docker Hub username and the repository name. Use the following command:
docker tag local-image:tag username/repository:tag
Replace local-image:tag with the name and tag of your local Docker image, and username/repository:tag with your Docker Hub username, the repository name, and the tag you want to use on Docker Hub.
Example:
docker tag book_api-server:latest harshal12001/book_api-server:latest
3>Push the Docker Image:After tagging, push the image to Docker Hub using the docker push command:
docker push username/repository:tag
Example:
docker push harshal12001/book_api-server:latest
This command uploads your Docker image to Docker Hub. The image will be available in your Docker Hub repository.


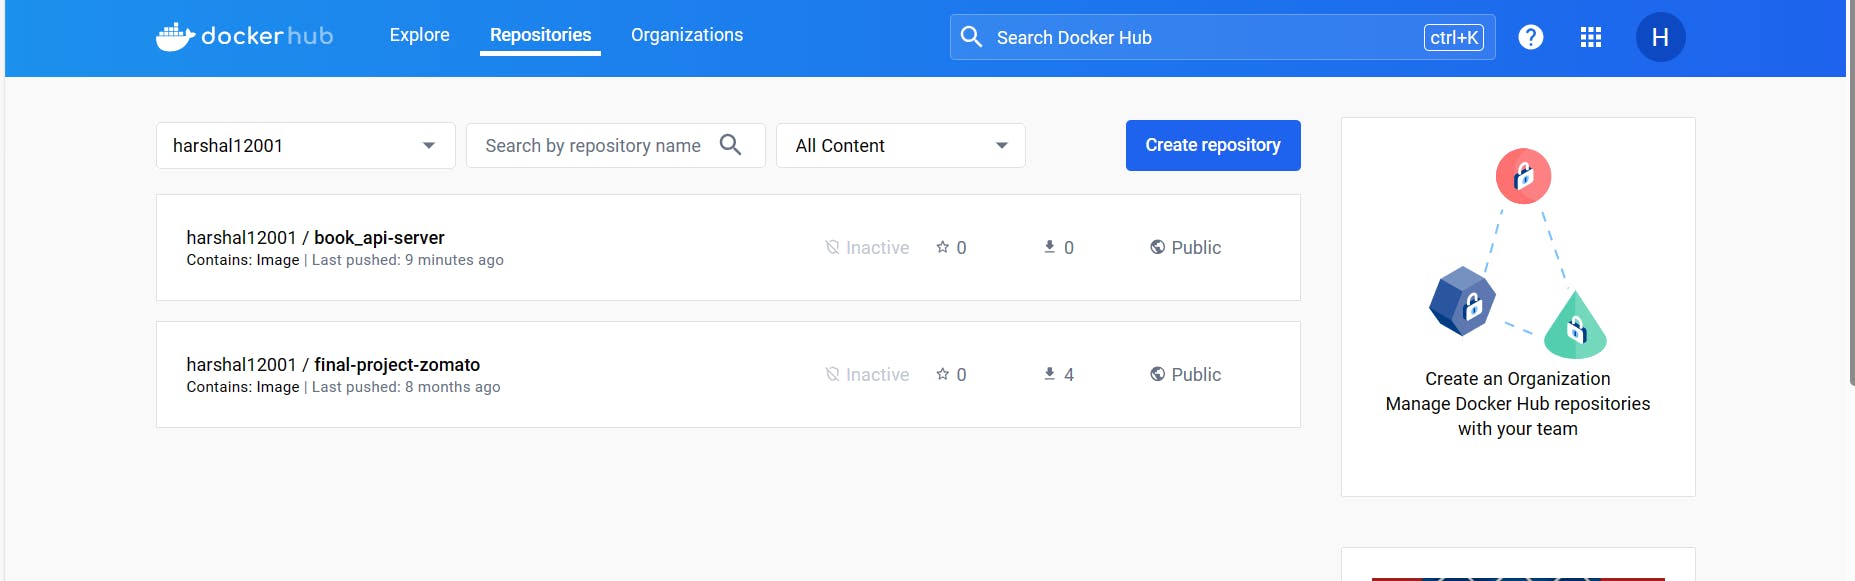
4>Verify on Docker Hub: Visit Docker Hub in your web browser and log in to your account. You should see your pushed image in your repository.
We are committed to delivering content that informs, inspires, and resonates with you. Your comments, and shared insights fuel our passion to continue creating valuable content.
As we move forward, we invite you to stay connected with us. Feel free to share your thoughts in the comments.
Once again, thank you for being a part of our community. We look forward to continuing this journey together.
"Happy Coding"